

Key Takeaways
Why a Running Toilet Deserves Prompt Attention
That faint hissing sound coming from your bathroom isn't just annoying - it's water and money draining away continuously. A toilet that runs nonstop can waste an estimated 200 gallons or more per day depending on the severity of the leak. Over a month, that adds up to a substantial spike on your water bill.
The good news: the vast majority of running toilets are caused by one of three simple, fixable problems - a worn flapper, an incorrectly set float, or a failing fill valve. None of these repairs require a plumber or special training. With a few basic tools, a replacement part or two, and about an hour of time, most homeowners can resolve the issue themselves.
This repair fits neatly into the kind of routine upkeep covered in seasonal home maintenance planning, where catching small problems early prevents larger, more expensive ones down the road.
What you will need
Diagnosing the Cause Before You Fix Anything
Remove the toilet tank lid and set it safely aside - it's heavy ceramic and will crack if dropped. With the tank open, flush once and observe what happens as the tank refills.
The Flapper Test
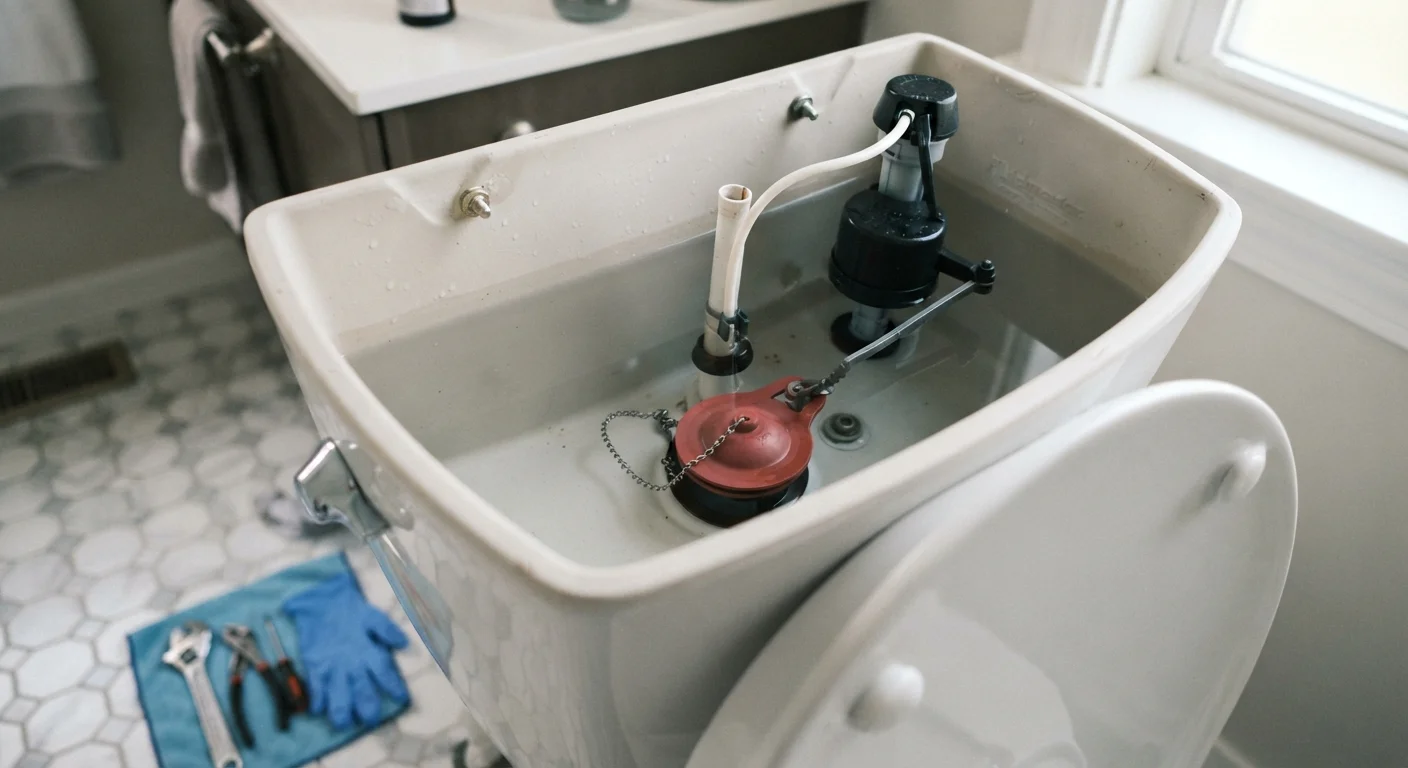
The flapper is the rubber seal at the bottom of the tank that lifts when you flush and drops to seal the tank for refilling. If it's warped, cracked, or coated with mineral deposits, water will seep past it continuously. To test it: press down on the flapper with your finger. If the running sound stops immediately, the flapper is your culprit.
The Float Test
The float (a ball or cup that rises with the water level) tells the fill valve when to stop. If it's set too high, water will spill into the overflow tube - the tall pipe in the center of the tank - and the toilet will run indefinitely. Look for water trickling into that tube while the tank is full. If you see it, the float needs adjustment.
The Fill Valve Test
If neither the flapper nor the float seems to be the issue, lift the float arm by hand. If water continues flowing even when the float is held at the top of its range, the fill valve itself is worn and needs replacement.
The Food Coloring Drip Test
Not sure if your flapper is leaking? Add a few drops of food coloring to the tank and wait 10-15 minutes without flushing. If color appears in the bowl, water is seeping past the flapper even when the toilet seems quiet. This simple test can confirm a slow leak before you hear any obvious running sound.
Tools and Materials You'll Need
Gather these before you start so you're not hunting mid-repair with wet hands.
Adjustable pliers
Used to loosen and tighten water supply line connections and fill valve lock nuts.
Replacement flapper
Seals the base of the tank; must match your toilet's flush valve size (most are universal or labeled by brand).
Replacement fill valve
Controls water flow into the tank; needed if the flapper and float adjustments don't resolve the issue.
Sponge or turkey baster
Removes remaining water from the tank after shutting off supply, making the workspace cleaner.
Towels or a small bucket
Catches water when disconnecting the supply line during fill valve replacement.
Screwdriver (flathead)
Used to adjust the float screw on older ball-float assemblies.
Step-by-Step Repairs
Work through these steps in order, testing the toilet after each fix before moving to the next. Often you'll solve the problem at step one.
Shut Off the Water Supply
Turn the shutoff valve clockwise until it stops. Flush the toilet to drain the tank, then confirm no water is refilling. This is the single most important safety step - working in a dry tank prevents accidental flooding and makes handling parts much easier.
Replace the Flapper
Unhook the old flapper from the pegs on either side of the flush valve and disconnect the chain from the flush handle arm. Take the old flapper to the hardware store if you're unsure of sizing - many store associates can help match it. Snap the new flapper onto the same pegs, reattach the chain (leave about half an inch of slack), and turn the water back on to test. The chain should lift the flapper fully when you flush but not get caught underneath it when it closes.
Adjust the Float
If the flapper swap didn't fix the issue, check the float. The water level in the tank should sit about one inch below the top of the overflow tube. On a ball-float assembly (a ball on an arm), bend the arm gently downward or turn the adjustment screw to lower the water level. On a cup-float (a cylinder that slides along the fill valve shaft), pinch the clip and slide it down. Turn the water back on, allow the tank to refill, and check that water stops before reaching the overflow tube.
Replace the Fill Valve
Shut off water again and sponge out remaining water from the tank. Disconnect the water supply line from the bottom of the tank using adjustable pliers. Unscrew the lock nut holding the fill valve in place (turn counterclockwise), and lift the old valve out. Insert the new fill valve, following the manufacturer's height adjustment instructions so the critical level mark sits above the overflow tube. Hand-tighten the lock nut, reconnect the supply line, and turn water back on. Adjust the float on the new valve so the tank fills to the correct level.
When to Call a Plumber
If you've replaced the flapper, adjusted the float, and swapped the fill valve and the toilet still runs, the problem may lie deeper - a cracked overflow tube, a faulty flush valve seat, or even issues with the water supply line. At that point, calling a licensed plumber is the prudent move. Continuing to run a toilet with an unresolved internal leak wastes water and may mask a more serious problem.
A running toilet is also a good prompt to evaluate your bathroom more broadly. If your fixtures are aging or your space feels dated, a budget-focused bathroom refresh can sequence improvements by impact without overwhelming your finances. And if you're curious about other plumbing maintenance you can handle yourself, safer drain-clearing techniques are another beginner-friendly skill worth having.
This article is for general informational purposes only. Plumbing work that involves supply lines, main shutoffs, or structural elements may require permits or a licensed professional depending on your local codes. Always verify local requirements before undertaking any repair.