Key Takeaways
Small Space, Big Impact
Knocking down a wall is one way to gain space - but it comes with permits, costs, and months of disruption. Before you go that route, it's worth knowing that most rooms feel cramped not because of their actual dimensions, but because of how they're organized, lit, and decorated. The good news: the fixes are often a weekend and a modest budget away.
Whether you're dealing with a tight living room, a boxy bedroom, or a bathroom that feels like a closet, these projects target the visual cues your brain uses to judge space. You don't need to move walls - you need to move the right things. If you're weighing bigger structural changes, our overview of the pros and cons of open-plan living conversions is a good place to start. For now, here's what you can tackle this weekend.
Hang Mirrors Across From Natural Light Sources
A large mirror positioned opposite a window doesn't just reflect your reflection - it reflects the outdoor view and natural light back into the room, creating the impression of a second window. Even a mid-sized mirror (24" × 36" or larger) hung at eye level can dramatically alter the sense of depth in a living room or hallway.
For best results, use a single large mirror rather than several small ones, which can feel cluttered. Leaning an oversized mirror against a wall is a no-drill option that also adds an informal, layered look. Avoid placing mirrors where they reflect high-traffic clutter - that amplifies visual noise rather than space.
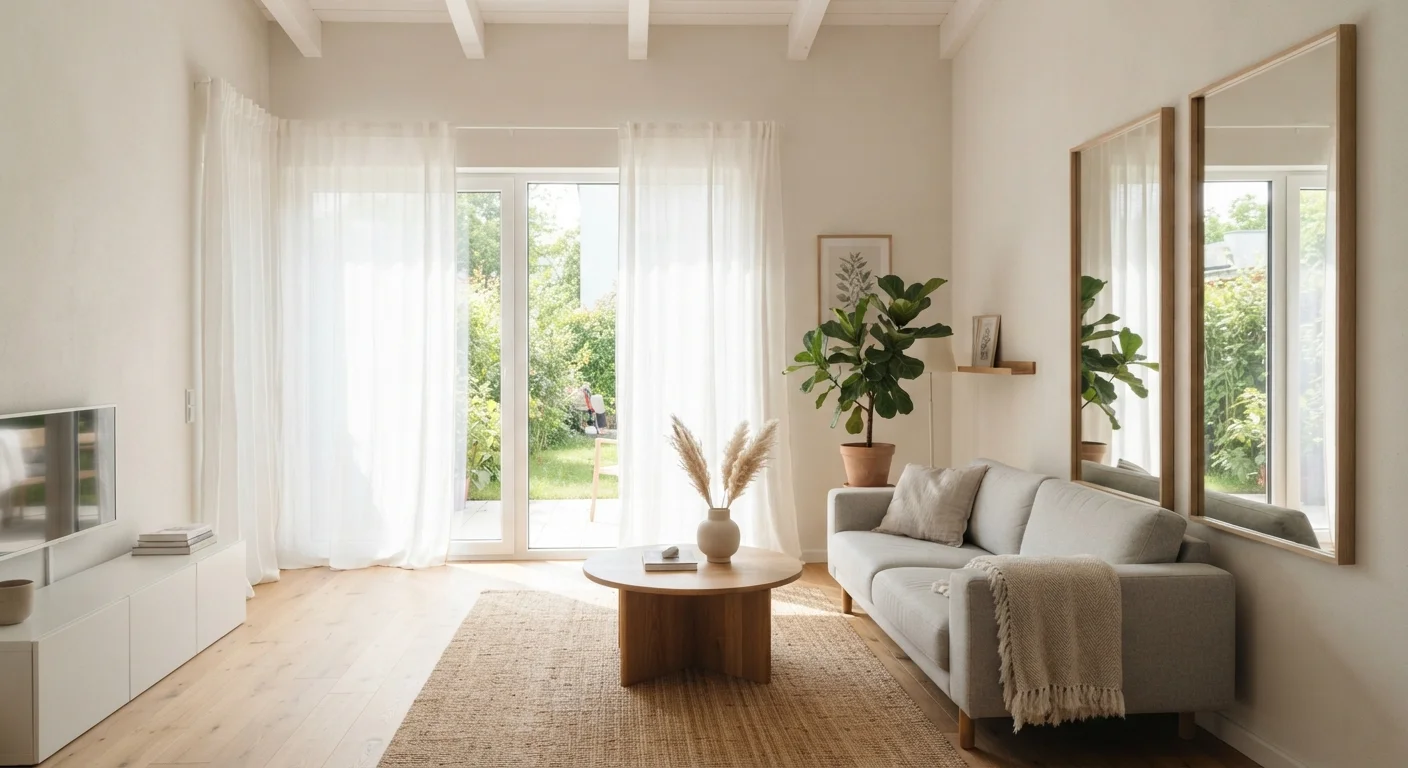
A mirror opposite a window can create the impression of a second opening in the room.
Paint Walls and Ceiling the Same Light Color
When the ceiling is a different (usually brighter) color than the walls, the eye reads the boundary sharply and the room feels boxed in. Painting both the walls and ceiling in the same soft, light tone - warm whites, pale greiges, or soft sage greens - blurs that hard edge and draws the eye upward.
Flat or matte finishes work best on ceilings to minimize reflections. On walls, an eggshell finish is more practical (easier to clean) while still keeping the surface from feeling heavy. Our guide on painting your own rooms covers the prep steps that make the biggest difference in final results.
Matching the ceiling color to the walls removes a visual boundary that makes rooms feel low and confined.
Replace Heavy Drapes With Sheer or Minimal Window Treatments
Thick curtains, especially in dark colors, absorb light and visually shrink the wall they hang on. Replacing them with sheer linen panels or slim roller shades lets in significantly more diffused daylight while still providing privacy when needed.
Mount the curtain rod as close to the ceiling as possible and let the panels hang to the floor. This elongates the wall line and makes standard 8-foot ceilings look closer to 9 or 10 feet. If you're renting or want a non-permanent option, tension rods with lightweight sheers work well in most window frames.
Ceiling-height curtain rods with floor-length panels visually stretch a room from floor to ceiling.
Rearrange Furniture Away From the Walls
Pushing all furniture against the walls is a common instinct in small rooms, but it often backfires. It creates a large dead zone in the center and makes the perimeter feel cluttered. Pulling sofas and chairs 6-12 inches away from the wall and floating them around a central anchor (a rug, coffee table, or ottoman) defines a conversation area and leaves breathing room around each piece.
Also consider the scale of the furniture itself. Oversized sectionals and bulky entertainment centers consume visual weight disproportionately. Swapping one large piece for two smaller ones - or choosing furniture with exposed legs - allows light to pass underneath and makes the room feel more open.
Floating furniture away from walls creates defined zones and frees up visual breathing room.
Add Vertical Storage to Draw the Eye Upward
Low, squat storage units keep attention near the floor. Tall bookshelves, floor-to-ceiling built-ins (which can be assembled from pre-made components without carpentry skills), or stacked open shelving pull the eye up toward the ceiling and signal that the room has height to spare.
Keep the top shelves lightly styled - a few books, a plant, a decorative object - rather than packed. Crowding upper shelves cancels the height effect. Vertical striped wallpaper on a single accent wall can produce a similar upward draw without any furniture purchase at all.
Tall storage units and vertical lines redirect the eye upward, making ceilings feel higher than they are.
Declutter and Use Under-Furniture Storage
No design trick compensates for visual clutter. A room with 20% fewer objects on surfaces consistently reads as larger and calmer. Spend part of your weekend doing a ruthless edit: remove items that don't serve a daily purpose or bring genuine enjoyment, and find enclosed storage for everything else.
Beds with built-in drawers, ottomans with interior storage, and baskets that slide under console tables all add capacity without adding footprint. If you've been meaning to tackle outdoor space similarly, the same minimizing logic applies - our piece on container gardening in limited outdoor space shows how focused, intentional choices work even in tight areas.
Removing just a few items from surfaces can make a room feel noticeably calmer and more open.
Putting It All Together
You don't need to do every project at once. Start with paint and mirrors - they deliver the highest visual return for the least investment - then layer in furniture rearrangement and lighting over subsequent weekends. Keep a consistent design thread (color palette, material finish) throughout so each change reinforces the others rather than competing.
Start With One Room, Then Refine
Apply these techniques to the room that bothers you most first - usually a living room or primary bedroom. Live with the changes for two to three weeks before spending more. You'll notice which adjustments made the biggest difference and can apply those lessons to other rooms more efficiently.
For ideas on how to plan and sequence these types of upgrades realistically, see our guide to home improvement on a budget. And if your goals extend into the kitchen, many of the same principles apply - our article on kitchen updates that don't require gutting the room shows how targeted changes can refresh a whole space without a full renovation.